Basics of Site Grading for Beginners
Land development projects change raw land into a place ready for building. Site grading is key in this process.
Grading reshapes the land to fit project needs. It makes slopes and levels the ground. This ensures optimal drainage and avoids problems.
Key Takeaways
- Site grading is essential for optimal drainage and stability.
- Land development projects involve transforming raw land into a functional construction site.
- Grading involves reshaping land to meet project needs.
- Understanding land development basics is crucial for construction projects.
- Proper grading prevents potential issues and ensures project stability.
Understanding Site Grading Fundamentals
Site grading changes the land’s surface to fit project needs. Understanding land elevation is key in this process.
What Is Site Grading and Why It Matters
Site grading reshapes the land for a stable surface. It modifies land contours to avoid water buildup and soil erosion. These issues can harm structures.
Proper site grading is crucial. It affects both looks and function of a property. It makes land use sustainable and follows rules.
Key Terminology in Site Grading
Knowing grading terminology helps in land development projects. Terms like “cut” and “fill” mean removing or adding soil. This shapes the land as needed.
Terms like grading ratios and slopes are also important. They guide land reshaping to stop erosion and ensure stability.
The Goals of Proper Site Grading
The main goals of site grading are a stable foundation for buildings, preventing soil erosion, and ensuring proper water drainage. These goals are vital to avoid costly problems during or after building.
Also, proper site grading makes a property look better. This increases its value and appeal.
Essential Tools and Equipment for Site Grading
For beginners, knowing the key tools and equipment for site grading is vital. The site grading process turns a piece of land into a solid base for building. It needs a variety of tools and equipment.
Manual vs. Mechanical Grading Tools
Site grading can be done with manual or mechanical tools. Manual grading tools like shovels and rakes work well for small jobs or fine details. But for big projects, mechanical grading equipment like bulldozers and graders are a must. They bring speed and accuracy to site preparation.
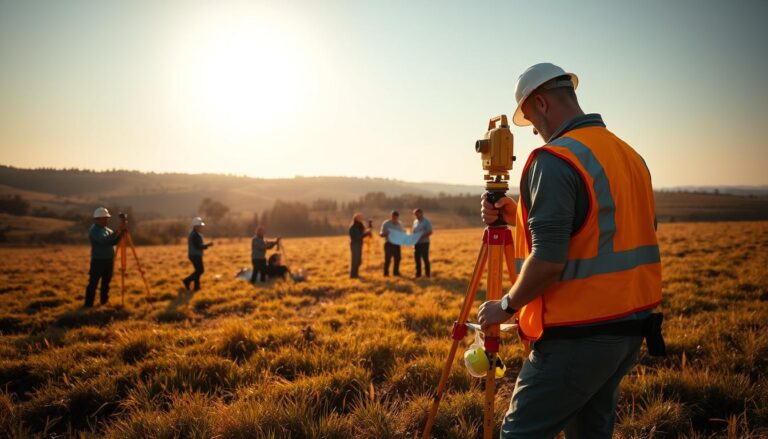
Surveying Equipment for Beginners
Surveying is key to how to grade a site right. Beginners can start with simple tools like dumpy levels, tripods, and stakes. For more complex jobs, total stations or GPS might be needed for precise grading.
Software and Digital Resources for Planning
Today, site grading uses software and digital tools for planning. Grading design software helps make detailed plans. Project management tools keep the grading work on schedule and within budget.
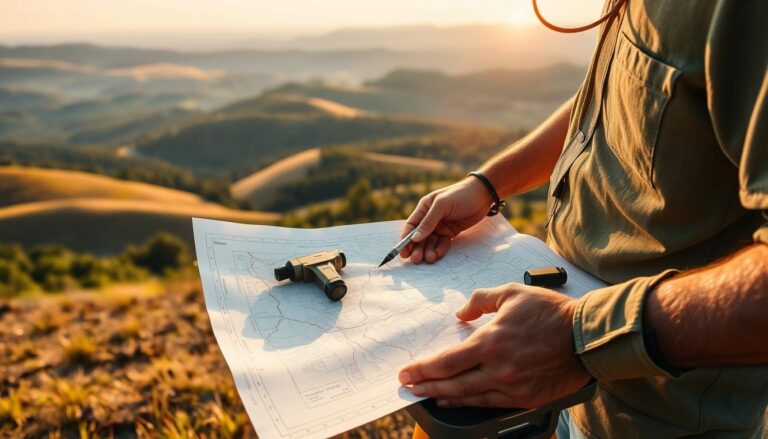
Reading and Understanding Topographic Maps
For beginners in site grading, learning to interpret topographic maps is key. These maps show the Earth’s surface in detail. They are vital for grading projects.
What Are Contour Lines on a Map
Contour lines on a map show elevation changes. Each line marks a specific height. Lines close together mean steep slopes, while wider lines mean gentler slopes.
It’s important to understand contour lines to see the terrain on a map. Index contours, which are thicker or bold, highlight big elevation changes.
Interpreting Elevation Changes and Slopes
To understand elevation changes, look at the distance between contour lines. Steep slopes have lines close together. Gentle slopes have lines that are farther apart.
- Close contour lines: steep slope
- Far-apart contour lines: gentle slope
- Contour lines forming a ‘V’ shape: stream or river valley
Identifying Natural Drainage Patterns
Topographic maps also show natural drainage patterns. Lines that form a ‘V’ shape usually point to a stream or river valley, with the ‘V’ facing upstream.
Reading Watershed Boundaries
Watershed boundaries are found by following the highest lines around a drainage area. Knowing these boundaries is key for managing rainwater runoff.
Spotting Potential Problem Areas
By looking at contour lines and drainage patterns, you can find problem areas. These might include steep slopes that could erode or low-lying areas that could collect water.
- Identify steep slopes that may require additional support or grading.
- Look for low-lying areas that may need special drainage considerations.
- Understand how natural drainage patterns may affect your grading project.
Planning Your Site Grading Project
Planning your site grading project is key to success. Effective planning involves several key steps to meet your goals. It also keeps your project within budget and follows local rules.
Assessing Your Property’s Current Conditions
The first step is to understand your property’s current state. This means surveying the land to know its topography. Knowing the slopes, elevations, and natural features is vital for a good grading plan.
Setting Clear Grading Objectives
After understanding your property, set clear goals for your grading project. This could be to create a level site, improve drainage, or make your land look better.
Creating a Basic Grading Plan
A basic grading plan starts with establishing reference points and determining finished grade elevations.
Establishing Reference Points
Reference points are key for a correct grading project. They help measure your project’s progress.
Determining Finished Grade Elevations
Determining the final elevations is crucial. It decides the land’s final shape after grading. This ensures your land meets your goals and local rules.
By following these steps and making a detailed grading plan, your project will be done well. This sets the stage for successful land development.
The Basics of Site Grading for Beginners: Cut and Fill Operations
Learning about cut and fill is key for good site grading. It’s about moving soil to shape the land. This makes uneven areas stable and useful.
Understanding the Cut and Fill Process
The cut and fill process has two main steps. First, soil is removed from high spots. Then, the soil is used to fill in low spots. This makes the land level or sloping in a good way.
To do cut and fill well, you need to know the land and what you want to achieve. It’s not just about moving dirt. It’s about making the land right for the project.
Calculating Cut and Fill Volumes
Getting the right amount of soil to move is important. You want to match the soil to be removed with the soil to be added. This saves money and reduces waste.
- Grid Method: This method divides the site into small areas. It finds the average depth of soil to move in each area.
- Cross-Section Method: This method makes detailed drawings of the site. It calculates the soil to be moved in each part.
Balancing Cut and Fill for Efficiency
Balancing cut and fill makes the project run smoothly. It means the soil moved from one place is about the same as the soil moved to another. This saves money and helps the environment.
This balance cuts down on costs and environmental harm. It reduces the need to move soil in and out of the site.
Equipment Selection for Different Project Sizes
The equipment needed for cut and fill operations depends on the project size and needs. Small projects might use hand tools or small machines. Big projects need big machines like bulldozers and graders.
Picking the right equipment is crucial. It helps the project go well, saves money, and gets the job done right.
Managing Rainwater Runoff and Drainage
Managing rainwater runoff and ensuring proper drainage are key to preventing costly issues. Effective drainage design is vital. It stops erosion and makes sure water flows away from structures.
Principles of Effective Drainage Design
Understanding the natural flow of water is key to effective drainage design. It involves assessing the land’s topography and soil composition. This helps find the best drainage solutions.
Surface Drainage Solutions
Surface drainage solutions manage rainwater runoff on the land’s surface. Two common methods are:
- Swales and ditches that direct water flow
- French drains and catch basins that collect and redirect water
Swales and Ditches
Swales and ditches are shallow, vegetated channels. They slow down rainwater runoff. This allows it to infiltrate the soil or be directed to an outlet. They work well in residential and agricultural areas.
French Drains and Catch Basins
French drains are gravel-filled trenches with a pipe. They redirect water away from a specific area. Catch basins collect surface water and send it into an underground drainage system. Both prevent water accumulation and erosion.

Subsurface Drainage Options
Subsurface drainage manages water beneath the surface. It includes installing drainage pipes or tile drains. These collect and redirect subsurface water. They prevent soil saturation and instability.
Erosion Control Measures During and After Grading
Erosion control is crucial during and after grading. It prevents soil loss and sediment runoff. Using geotextiles, riprap, and vegetation stabilizes the soil. These measures keep the land stable and productive after grading.
Site Preparation Techniques
Preparing the land for grading is a key step in any project. It involves clearing the land, testing the soil, and ensuring it’s compacted right. These steps are crucial for a successful project.
Clearing and Grubbing the Land
The first step is clearing and grubbing. This means removing trees, plants, debris, and obstacles. It gets the land ready for grading and avoids problems later on.
- Check the land for trees and plants to remove.
- Use bulldozers or excavators for clearing.
- Grubbing removes roots and underground debris to avoid settlement issues.
Soil Testing and Analysis for Proper Grading
Soil testing is key to knowing the soil’s properties. Grading terminology helps understand soil types, moisture, and compaction. This knowledge is vital for grading.
- Do thorough soil tests to learn about its composition.
- Analyze the results to spot issues like expansive soils or poor drainage.
- Use the analysis to plan the right amendments or grading methods.
Compaction Requirements and Methods
Compaction is crucial for a stable base. It prevents settlement and keeps the land stable over time.
Proper Moisture Content
The right moisture is key for compaction. Soil that’s too dry or wet is hard to compact.
Layering and Sequential Compaction
Compaction works best in layers. This allows each layer to be compacted fully before adding more. This grading terminology explained method ensures even density across the site.
- Compact soil in thin layers for the best density.
- Use rollers or plate compactors for compaction.
- Keep an eye on compaction to reach the desired density.
Land Improvements Through Effective Grading
Effective land grading is key to turning rough landscapes into useful and beautiful areas. For those new to land development, knowing how to grade the site right is vital. It can greatly change the outcome of their projects.
Creating Usable Spaces on Sloped Land
Land developers often face the challenge of uneven terrain. Effective grading techniques can level the ground and remove obstacles. This makes the land more useful and increases its value.

Enhancing Property Aesthetics with Contoured Grading
Contoured grading shapes the land for a stunning look. By designing the land’s contours, developers can make beautiful and functional outdoor spaces. This boosts the property’s look and market value.
Improving Soil Quality and Vegetation Growth
Proper grading also improves soil and plant growth. By grading the land correctly, developers can better drainage and reduce erosion. This helps plants grow well, which is key for landscaping or farming.
Long-term Benefits of Proper Site Grading
The benefits of proper site grading last long after the project starts. Well-graded land cuts down on maintenance costs and reduces erosion risks. For beginners, knowing these benefits helps make better project decisions.
Conclusion
Learning about site grading is key for turning a raw land into a useful and beautiful area. We’ve covered the basics of site grading, like its role, tools, and methods for handling rainwater and improving looks.
Site grading is more than changing the landscape. It’s about setting up a solid base for future projects that’s both green and smart. Knowing how to grade a site right helps avoid problems like water buildup, soil loss, and bad drainage. These issues can cause big expenses and headaches later on.
The process starts with careful planning. This includes studying topographic maps, checking the land’s condition, and making a grading plan. Doing these steps boosts the land’s value and makes it more stable and lovely. Understanding site grading basics is a crucial step towards reaching your land development goals.